Tuesday, December 27, 2016

Making A Leg Tapering Jig

The tapering jig I have used in the past stayed with the shop when I retired and since this is such a handy jig I need to make a new one. I am going to make some changes in the design this time around.

The "old" tapering jig


I want to use thicker plywood for the base this time. The old base started flexing after a few years of use. I think this is due to the base thickness but also due to the pressure applied by the hold down arm to the base. I will use a De Staco clamp attached to the fence for the hold down and will try to spread the pressure on the base over a wider area. I want to make it easy to adjust so I am also going to use T track and nuts for the fence adjustment.

Here is the drawing I have made to help put this jig together


I am making it long enough to hold a 36" piece and am making the fence adjustable to accommodate wide stock. The clamp will have to have different base heights to accommodate thicker pieces of stock. The current configuration should cover the most common sizes for me.

Thanks for taking a look. I'll get to work putting this together soon so check back and see how it's going.

Thursday, December 22, 2016

Finishing Up A Table

This project started with a few nice pieces of ash. I had the material left over from a past project and had been looking at the pretty quarter sawn grain that could come from them. These pieces were about 4" X 6" X 36" long. By re sawing I could come up with quarter sawn material for the top and apron, and rift sawn material for the legs. I started designing a small table with drawers several years ago to be made from this ash. I finally started building this table a year or more ago. I made the top but was still making design decisions about the legs and placement of drawers. Other things came up and needed doing so I never got farther than blanking out the material for legs, apron and frame parts. Well, the time to finish that project has come.

The top has already been finished with 3 coats of Tried and True Varnish Oil followed by 3 coats of wax.


The other material has been stickered on the lumber rack rack waiting for me to get back to it.


Here is a basic drawing of the table.


I decided to make the legs with a double taper, a design I have used before and like. I will also have a drawer in each of the narrow ends of the table. Since the drawers will be full height the stretchers will  be concealed behind the drawer front. The joinery at the top of the leg is shown in plan view in the drawing below.

Well, I'll be getting started on this table soon, but I need to make a leg tapering jig first. More about that next time. Thanks for taking a look and leave a comment if you want to. I like to think people are reading this but it would be nice to have some verification!

Tuesday, December 20, 2016

A visit To The Mint Museum, Charlotte, North Carolina


Detail of Salmon carving, Mint Museum.

While in Charlotte, North Carolina, I had the opportunity to visit the Mint Museum at the downtown location. This museum houses a nice collection of American and Contemporary Art as well as a collection of Craft and Design pieces.


I found the craft collection to be very enjoyable as well as informative.


There were several turned bowls and vases, some segmented, displaying superb craftsmanship and detail.

I was pleasantly surprised to see some work by several furniture makers I had read about in the past. There was a piece by Gary Knox Bennett and a work by Silas Kopf. The interior of the museum was a bit dim so I didn't make a picture of the Bennett piece but was able to make a pic of the Kopf piece.
It took 2 shots to get the whole scene. Silas Kopf is a master of Marquetry. More of his work can be seen on his website Silas Kopf Woodworking


Besides the collection of contemporary work there was also a collection of historical pieces which I found fascinating and frustrating. A lot of what I wanted to see was interiors of cabinets and drawers etc. and the pieces were not displayed to provide that kind of view. Here are a few pieces they had on display.


 I did make one shot of the underside of a chest but was quickly told that I was too close to the work and had to back off. You can see some of the construction details though.


All in all I had an enjoyable few hours looking at the furniture and wooden objects. I recommend going to as many museums as you can, whether you are traveling or are at home, there are always opportunities to see others work and to be inspired and informed by the experience.

Thursday, December 15, 2016

Lumber From North Carolina

Here are some pictures of the lumber I picked up in North Carolina.

This is Hackberry, the spalted piece. It may become a table but at this point I am not sure. It really needs to acclimate for a while yet. I'll move the hackberry to the basement soon.


And here are the 2 pieces of Hackberry I bought so I would have wood for legs or apron or both, depending on what the piece becomes.


And here is a shot of the Pecan boards that my friend Jeff gave me. These boards are 8 feet+ in length so I didn't include the whole of the pieces.


The Pecan rode on my ladder rack the whole trip back to Oregon. The Hackberry was in the bed of the truck covered by a canopy. The pecan seems to have come through without any problems despite being rained and snowed on. The Hackberry didn't like moving and has developed some big checks in the ends. I kind of expected this but hope the spalted slab will yield a nice size piece. It will be a while before I work on that though.

Well, that's it for today. Thanks for taking a look and I'll be back to making some stuff soon.

Tuesday, December 13, 2016

A Visit To A Small Sawmill In North Carolina

While I was in North Carolina to attend a wedding I kept trying to find someone with knowledge of what all the tree species I was seeing were. The forests in Appalachia contain a large number of trees I could only vaguely recognize and they are for the most part deciduous. These forests are very different from the conifer forests I grew up around in the Pacific Northwest. I did finally meet someone who said he did know the trees because he had a sawmill. Well, this piqued my curiosity and we began talking. Soon Jeff had invited me out to his farm to see the mill he was restoring and to pick up some boards that he had previously milled and had stored in his barn. Well, OK. This is exactly what I was hoping to stumble across so we exchanged contact info and made a tentative plan to meet up later in the week.

A couple of days later, after some navigation issues and a phone call or two, I arrived at Jeff's farm and we immediately set out for a local sawmill, Ritchie Farms and Sawmill,  Mt. Pleasant, North Carolina, operated by Mr. Don Ritchie. Jeff needed to pick up some pine 1X material and I was eager to see what hardwood material he might have. Here is Don's mill set up. He has a nice wood miser mill. In this photo, Don is on the right and Jeff is on the left.


Jeff loaded up the lumber he needed and then Don started opening up various sheds and containers to let me take a look at the material he had available.  There was a lot of tempting stuff. Walnut and Cherry is much less expensive on the East Coast!


I really couldn't fill my truck up. I still had a long drive back to Oregon and didn't want to add too much weight but I did find a slab of spalted Hackberry that seemed unique and not available out west. I also bought a few other pieces of Hackberry so I had material to make legs and/or aprons from.


Don totaled up my purchase and I paid him and left with what I hope will be some special lumber to make a special piece of furniture from. Jeff and I went back to the farm where he showed me the wood miser sawmill he has been restoring. It should cut a lot of wood when he gets it finished. Jeff also gave me 4 nice boards of Pecan which he had milled up. All in all, I had a great day out in the North Carolina countryside visiting with folks who appreciate lumber! The return trip to Oregon was a little hard on the Hackberry slabs. I went from low to high humidity several times and the temp ranged from 80 degrees F. to around 10 degrees F. Some checks have opened up on the ends and I will put this stuff aside for maybe up to a year or more until it looks like it has stabilized. On the other hand, the Pecan came through really well even though it was up on the ladder rack the whole trip home getting rained and snowed on. 

I'm still getting settled after returning home and haven't spent much time in the shop yet. It will probably be another week before I get back to all the projects I am working on. Well, you'll hear about those pretty soon so keep checking in. Thanks for taking a look.

Friday, December 9, 2016

Back to Blogging

Well, I'm back after a long trip across the Continental United States. I put a lot of miles on my truck and visited many unique spots in this country I live in. I even saw a few things that woodworkers would be interested in. Check back next Tuesday as I attempt to maintain a regular schedule of posting on Tuesdays and Thursdays, for a while anyway.
Thanks for taking a look.
Michael

Thursday, November 10, 2016

On Vacation?

I have a very busy month coming up and I can see that I will not be posting much (if at all) until around the beginning of December. I want to thank all who have been following along. I will be back and writing about making some cabinets for the shop, building a side table, and building a pedestal base dining table, among other things, so, check back or follow this blog.

Thanks again for reading.

Michael

Tuesday, November 8, 2016

Final Assembly, Finally!

Glue up is relatively easy at this point. I first glued up the front panels and legs.


After the glue had set on the front, My friend Richard dropped by. He had offered to help me with the glue up and I had accepted his generous offer. We set to work applying glue and putting parts together. First one of the side panels, then the floor (no glue here), then the other side and finally the back piece. This all went smoothly except for my forgetting that the legs were not yet glued to the back piece and we had to take that assembly off, glue up the legs to the back, and then re set the assembly. Luckily we noticed this before we had brought any of the parts completely home. I was also using glue with a 20 minute open time.


The other complication I had anticipated and had 4 screw clamps that I had notched a jaw of so I could bring the side stiles tight to the legs if needed.


It was and I did. After the glue set and I had removed the clamps I could plane the ends of the legs flush to the rails. I had left these a hair long.


My low angle block plane worked really well to flush that end grain down.


I skewed the plane to the work and carefully sliced until I had the tops nicely flush.


It looks good!


Next I mortised for the hinges using the template I had made previously and applied 2 coats of wax to the lid and outside of the chest. With that done I re-attached the hardware and stood back to take a look. All in all I am pleased with the way this piece came out. The contrast between the maple and walnut works well and the book matched panels look really nice.


Here is a look at the inside.


And a look at the hardware.


Thanks for taking a look. I hope you have enjoyed seeing how I made this piece. Check back again and see what I am up to next.


Thursday, November 3, 2016

Getting Ready For Final Assembly

I still have a few things to take care of before I can assemble the chest. I need to detail the edge at the bottom of the leg to protect it if the finished piece is ever dragged around. I also want to apply wax to at least the interior surfaces. Since I am leaving the floor unfinished I don't want to have to apply oil or wax to the surrounding surfaces. I will have a bit of detailing to do after assembly at the top edges of the legs.

For the edge detail I scribed a line about 3/32" around the sides of the leg as well as the bottom.


I then used my block plane to bevel the corners.


The finished chamfer.


I taped the inside areas of the legs where I didn't want oil and set to work applying two coats, with 24 hours between.


I also got to work applying wax to the inside surfaces of the already oiled parts.


The wax adds just a touch more gloss than oil alone. The bottom piece has been waxed.


Here are all the parts waiting for the last applications of finish.


One of the last things I do is to inlay a piece with my initials and the year of construction into the bottom of the floor. I made a template by taping the paper pattern to a piece of plastic film, (actually the peel off backing from a piece of 3M lapping film), and cutting out the letters and numbers with a razor knife. I then could put the template on the workpiece and pencil in the outlines. Then I practiced, experimented, got frustrated multiple times, called up distant memories of carving episodes of "The Woodwright's Shop", and eventually made one piece I was somewhat happy with.


As I practice carving more I expect that I will be confident enough to carve an actual part, but not today! I then made a template to guide the router to excavate the mortise.


The blue tape is shimming the guide to a tight sideways fit. I made the side cuts in the template too big initially. Here is the piece set into the bottom.


Now it is ready for final glue up.

Wednesday, November 2, 2016

Mortise & Tenon Magazine issue 2

Available for pre order now at the Mortise & Tenon website. Check their site for content etc. I recommend this magazine if you are interested in woodworking hand tool use, pre-industrial woodworking technology, antique furniture or conservation of same.

Tuesday, November 1, 2016

Finishing The Floor

Now, back to putting the piece together, I still have to notch the floor corners and run a rabbet around the bottom face to fit into the groove in the bottom rails and legs. I laid this out on the floor itself and checked my measurements and calculations several times before going any farther.


I used the router to make the rabbet. Here I am setting the depth.


I could use the router fence for the long edges.


After that was done I cut the corners out with a jig saw.


I then made the rabbet for the inside corners. I made a simple guide so I would get a neat rabbet.


After making the rabbet I used my block plane to round over the edges of the rabbet. I know this will not be visible without turning the piece over but I want the work to look "neat" everywhere. With the floor now ready I make a test fit with all the parts.

The inside


The bottom


View of the bottom inside corner


And the first time all the parts are assembled together


With everything fitting well, I disassemble one last time and prepare for glue up.

Thanks for taking a look. I hope you check back again and see how it's going.

Thursday, October 27, 2016

Hardware; Hinges And Hold Opens

I finally settled on hardware for the chest today. I have looked extensively online for hold open/soft close hardware that would prevent an accidental closing, potentially on a child's head or hand, and have found that while there are a number of pneumatic and friction or spring type devices available, only one device actually makes any claim to prevent injury due to slamming, so those are the ones I am using.


I ended up going to the 
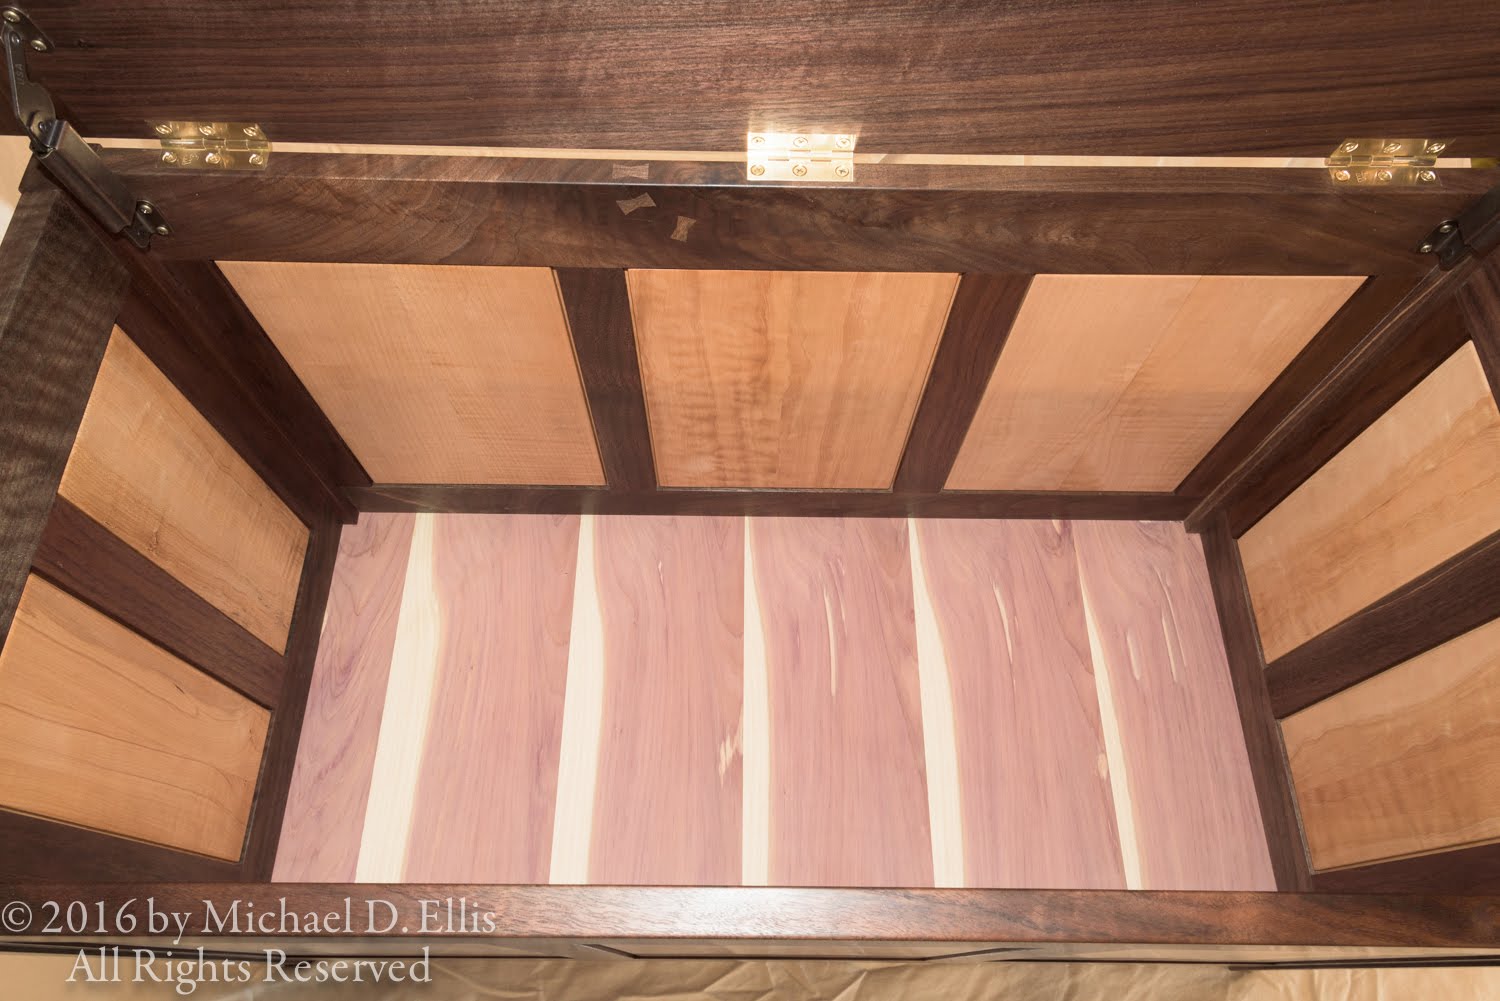
Woodcraft store in Tigard, Oregon as they have these devices in stock. These are also available at Rockler through their stores or catalogs. These devices come in three weight ranges and are handed. A simple formula (width X weight/2 ) calculates a number which you use to determine which size you need, as well as how many. This lid weighs 12 pounds and is 18 inches wide so I came up with 108 which required 2 medium duty hold opens.

These devices are only available in statuary bronze finish which isn't a look I had in mind initially, but, this piece will be going to live with a young family and I assume children will be in their future, so the safety consideration is foremost in my mind. I have convinced myself that the dark color of the hold opens will almost disappear against the dark walnut.

I also bought butt hinges at Woodcraft, bright brass,  2 1/2" X 1 1/2", made by Worcester Parsons. Woodcraft has a nice selection of high quality brass hinges in a surprising variety of sizes from several manufacturers.


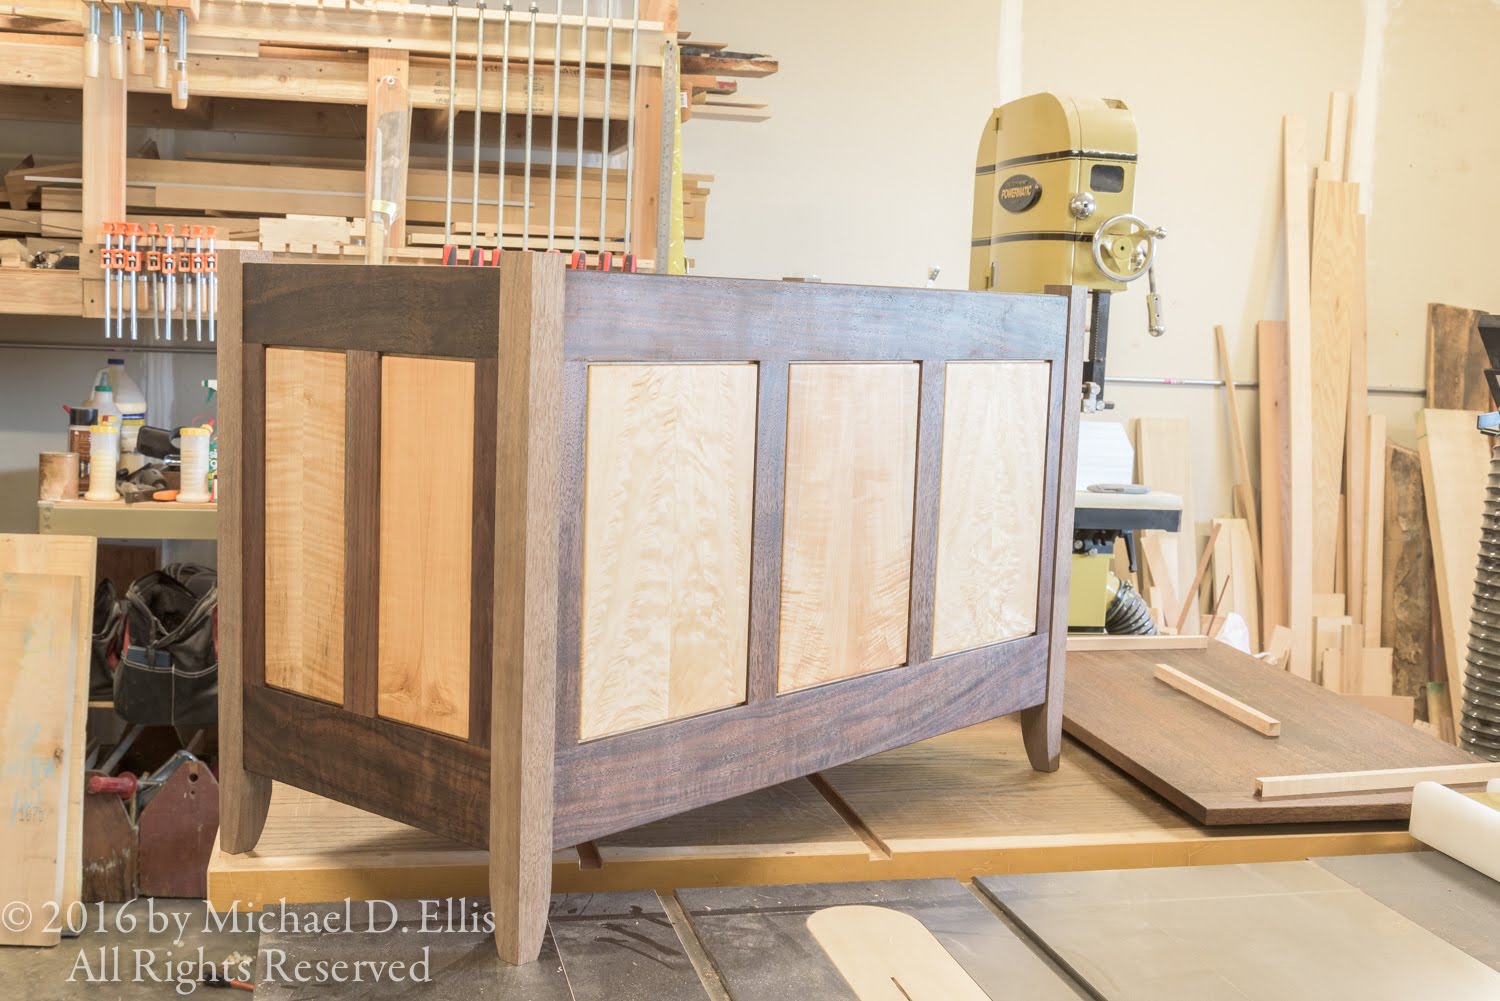
I made a template to rout the hinge mortises with. I used a 1/4" bit with a 7/16" O.D. guide bushing, giving me a 3/32" offset from the bit to the outer edge of the guide. Thus I need to make my cutout 3/32" deeper than I want and 3/16" wider as well as accounting for the width of the fence material. I laid this out on a piece of plywood and made the cuts on the table saw. I raised the blade up through the material for the lineal cut.


I used the mitre gauge for the side cuts.


After making the cutouts I then added the fence and gave it a try on some scrap material.


The hinge fits really well. I will have to use a shim for the mortises on the  case since the rails are set back 1/8" from the legs. 


Well, that's it for now. Thanks for taking a look. Check back again. I'll be getting this project wrapped up soon.