Showing posts with label glue up. Show all posts

Friday, September 30, 2016

The Lid And How To Make It

Here is my lid material cut to approximate length. I am using triangle marks to show orientation of the pieces.


I flatten on the jointer and square an edge, then run through the planer.


Now I check the fit and set up for glueing. I have some Bessey clamps and often don't need clamp blocks. Below I have dry clamped the first two pieces I will be gluing. 


I have laid the clamps out on the bench and put blocks beneath the work pieces to raise the work slightly above the clamp beam, I have a damp rag, the dry fit looks good, and I am ready to glue!


I apply a bead of glue to each surface and spread it with something convenient. I like to use a piece of formica but I couldn't quickly find one (it's getting a little cluttered here, I'll have to clean up soon) so I am using a thin piece of walnut. 


If my glue up is good enough I won't need to do any serious surface planing so I work to keep the surface of each piece level with the other along the length of the joint. I use my fingers to feel the joint as I work along and tighten the clamps.


If necessary I also use a block underneath the joint and one on top which I strike with a dead blow mallet to even the surfaces.


I check across the width with a straight edge for any cupping. This can be caused by clamp pressure if your clamps are crooked or all on one side. Alternating the side the clamps are on can remedy the cupping 


You will notice I have added some clamping cauls here for the second set of boards to help spread clamp pressure across the boards. Now it's on to other things.


Well, it's been a few days now and I need to join the two pieces I have made thus far. One set has bowed a little. I have some thickness to play with although I think it will end up a little thinner than the 7/8" dimension I had in mind initially. Of course it's the 11" wide piece and my jointer is 8". It is possible to joint half the board, turn it and joint the other half, although it does require removing the blade guard and that is not something I relish doing.

It could be done by hand, or, I could use the planer. If I just run the bowed piece through the planer the planer rollers would push the bow down against the bed instead of removing the high part only. But, by putting the board on a flat base and shimming the hollow portion to keep the planer rollers from pushing the bow down I can basically use the planer as a jointer.

Here I am using a piece of plywood for the base. I ripped some thin pieces and also used some wedges to shim the high points in the middle.


I then added side and end stops with double stick tape. I measured the high point to get a starting point for the planer and I am ready to go.

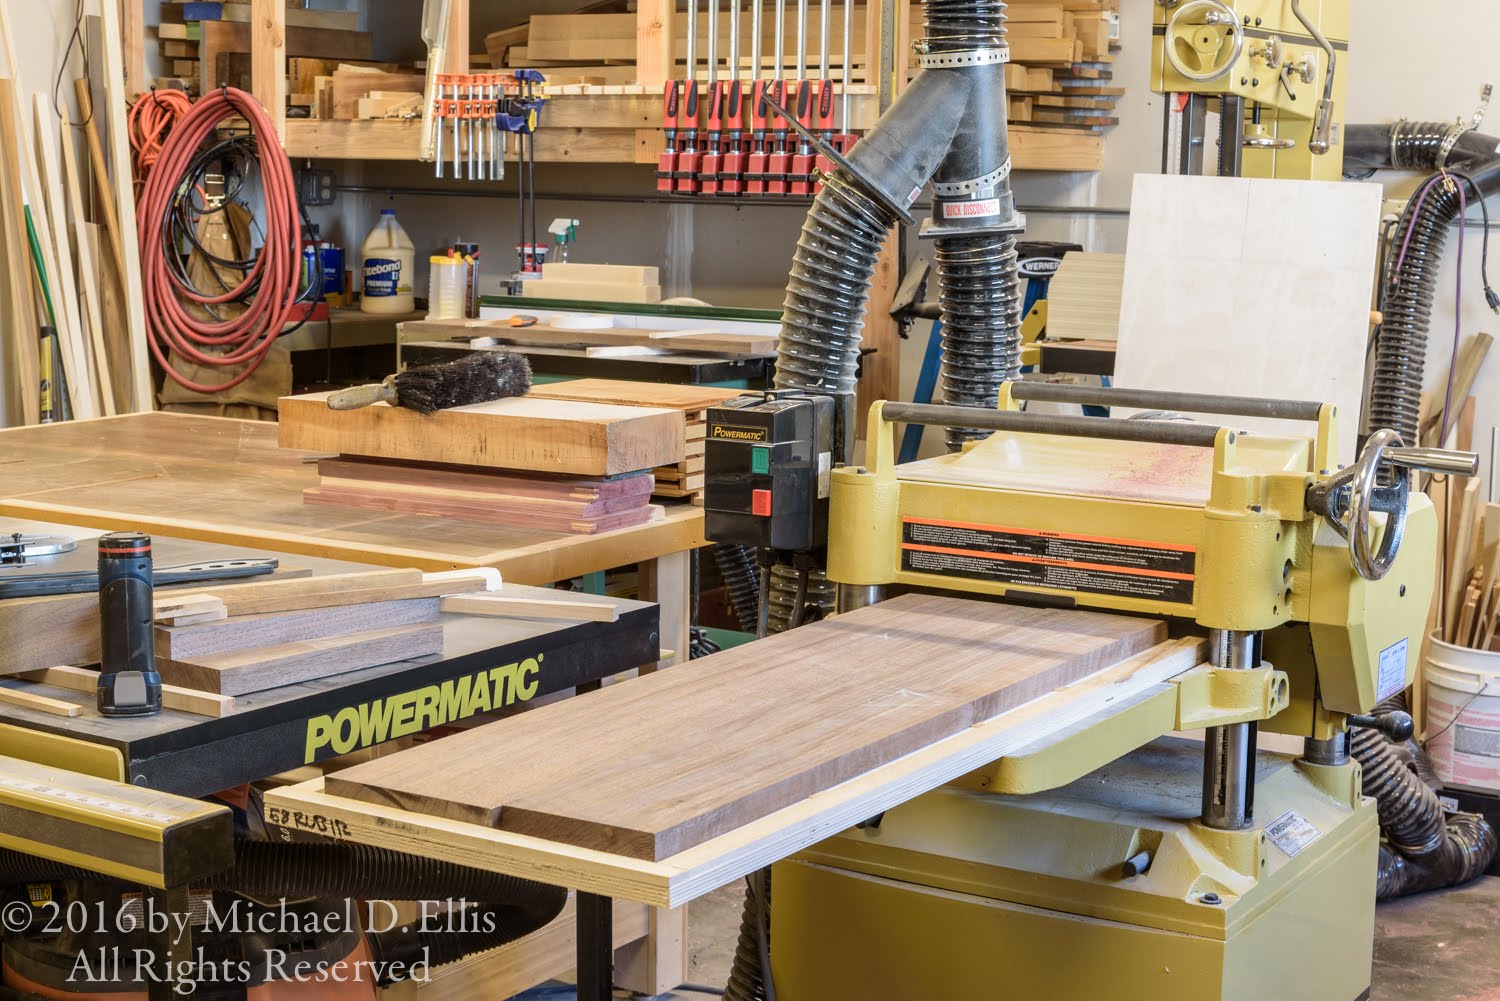


That worked pretty well. I was able to get the bow out of the face and then plane the other side to even thickness, a bit over 13/16". I jointed the mating edges on the planer, then ganged them together for hand planing.


Now I can glue the pieces together.


Next time Breadboard ends!


Wednesday, June 22, 2016

Glue and clamps and nerves, oh my

Glue up is a special time. You have spent many hours readying your parts and now it is time to put it all together. If you goof up here it is exceedingly difficult to take your piece apart and have anything usable left. The glues I use (titebond pva types) set, depending on the type, in 5 to 15 minutes and cure in 24. If you put a part in wrong and have to remove it even after only a few minutes, the parts can tear and break if you can move them at all. This means that you should be prepared!

You need to do a dry fit with clamps to insure that all fits well and you have the clamps, cauls, and blocks you need.


You also need to think about the work and how long it will take to assemble everything. Sometimes you can assemble in sections,


sometimes you have to put everything together at once.


You should think through your method to apply the glue too. Brush, roller, squeeze bottle, spreaders, all should be at the ready. For a really big job you may need to enlist some help. It is never any fun when your parts seize up before you have finished the job.


I use several different glues depending on the requirements for the job. Titebond II is great glue. It sets quick though so is generally not the one to use for a large job. Titebond II is not waterproof. The glue line is fairly colorless with Titebond II. Titebond III is waterproof and has a longer open time. It does dry to a somewhat dark glue line so keep that in mind. I will use Titebond III on this project so I have more time to adjust and clamp. These doors are being installed in an exterior location so the waterproof quality doesn't hurt either.


I have all the clamps, glue, brushes and spreaders ready to go. Now to work!


Click to play animation of glueing up a door.


One down, one to go. I only have enough clamps to do one at a time. I'll get that done tomorrow. I will give the doors a good sanding in preparation for painting. They will be installed in the opening of my "dust house". I'll write about that at a later date here on the "It Starts  With A Tree" blog.

Thanks for taking a look I hope you enjoyed seeing how I did this.