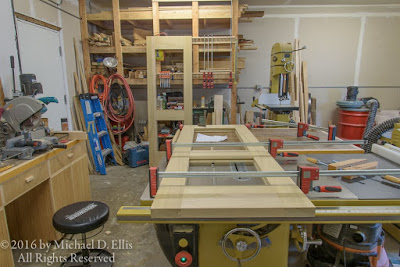
You need to do a dry fit with clamps to insure that all fits well and you have the clamps, cauls, and blocks you need.
You also need to think about the work and how long it will take to assemble everything. Sometimes you can assemble in sections,
sometimes you have to put everything together at once.
You should think through your method to apply the glue too. Brush, roller, squeeze bottle, spreaders, all should be at the ready. For a really big job you may need to enlist some help. It is never any fun when your parts seize up before you have finished the job.
I use several different glues depending on the requirements for the job. Titebond II is great glue. It sets quick though so is generally not the one to use for a large job. Titebond II is not waterproof. The glue line is fairly colorless with Titebond II. Titebond III is waterproof and has a longer open time. It does dry to a somewhat dark glue line so keep that in mind. I will use Titebond III on this project so I have more time to adjust and clamp. These doors are being installed in an exterior location so the waterproof quality doesn't hurt either.
I have all the clamps, glue, brushes and spreaders ready to go. Now to work!
Click to play animation of glueing up a door.
One down, one to go. I only have enough clamps to do one at a time. I'll get that done tomorrow. I will give the doors a good sanding in preparation for painting. They will be installed in the opening of my "dust house". I'll write about that at a later date here on the "It Starts With A Tree" blog.
Thanks for taking a look I hope you enjoyed seeing how I did this.


No comments:
Post a Comment
Comments welcome if on topic.